In one of my previous posts about origami sonobe balls I posted a picture of how I had used some of the balls that I had folded as Christmas tree ornaments. The post is
here. The tree is made from regular poster board that you can find at just about any store that sells any kind of office supplies (I've found it in grocery stores and pharmacies as well as the more conventional stores like Walmart). It had its own challenge in folding due to the fact that poster board does not fold nice and neat. I had to score all of the folds before trying to manipulate the poster board. Smaller trees made from colored copy paper are much easier to make and work with (but substitute poorly in replace of a traditional Christmas tree :) I recently had someone post that they would love to know how to fold this model (they also pointed out that there are conveniently 24 compartments & a star on top that would work great for an advent calendar leading up to Christmas). Since I've been thinking of posting a tutorial on how to fold something, this seemed like a great time to do it.
Please note: I did not design this model. Please do not give me credit for the design. Credit should be given to Rae Cooker (USA) and Makoto Yamaguchi (Japan), who apparently both developed this model independently of one another. The book that I learned it from is
The Magic of Origami by Alice Gray and Kunihiko Kasahara with cooperation of Lillian Oppenheimer and Origami Center of America. This book is fantastic for beginners, it was one of the first books I got. It has a fairly decent range of very simple to a little more challenging models for those just learning. It has models just for show and aesthetics as well as functional models to play with and decorate with. An excellent book for learners. So, here goes my first attempt at an origami photo tutorial.
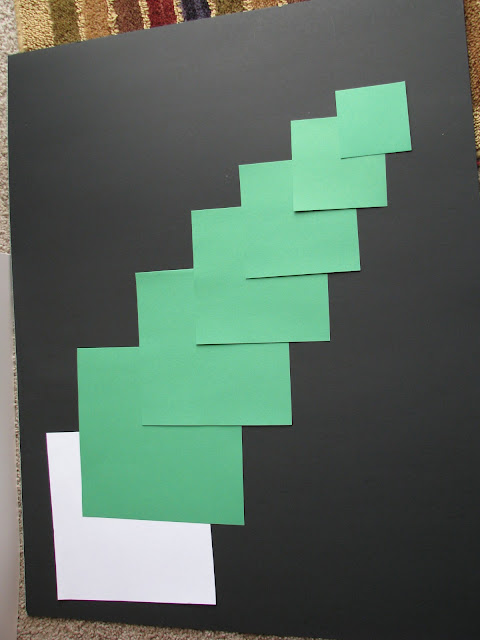 |
| To begin, you will need 7 different sheets of paper. For the tutorial I'm using white for ease of photographing, this will be the trunk and so should be out of either brown or black (I've never found brown copy paper, so I use black). The remaining 6 sheets should be varying sizes. For the trees I make I start with an 8 inch piece of paper and go down 1 inch for each additional sheet; so here I have an 8, 7, 6, 5, 4, and 3 inch squares of paper. Also, the largest green square and the square used for the trunk (the white sheet here) are the same size - 8 inches. Note: any number of green sheets can be used, I am using 6 for the benefit of giving 24 compartments for an advent calendar. |
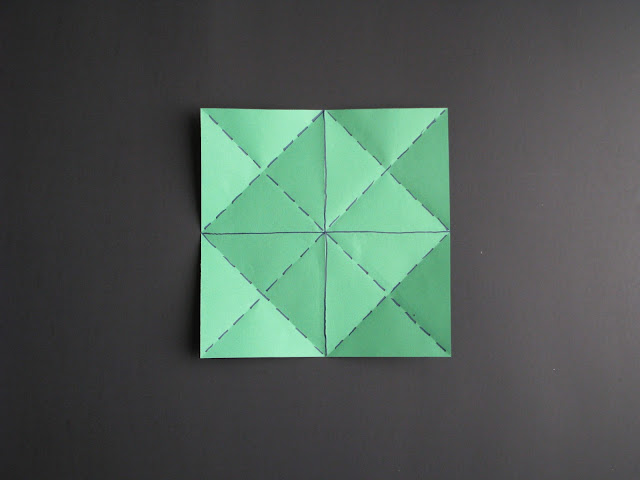 |
| We start with the largest green square. The dotted lines indicate a valley fold while the solid lines indicate mountain folds. A valley fold is created by folding the sheet of paper and then unfolding it. As it sits on the table the paper should slope up as it moves away from the fold; thus creating a "valley". The reverse is true with a mountain fold. |
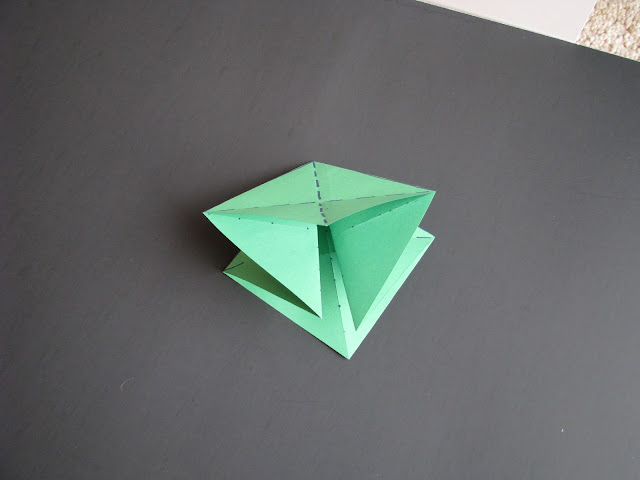 |
| This next step is often called the preliminary base or bird base in origami books. The easiest way to describe it is that all 4 corners of the square come to the same point when folding along the pre-creased lines. |
 |
| Here are 2 more pictures to try to help show what you should have. |
 |
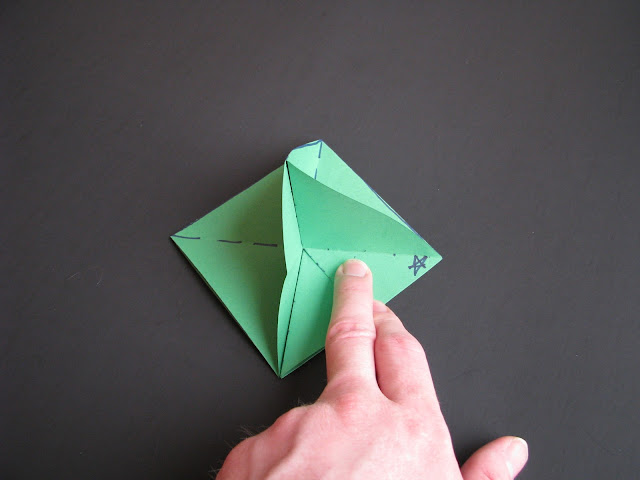
| The next step is to add a valley fold that goes between the center and the lower right edge. Also notice that a valley fold is turned to a mountain fold that extends from the center and goes to the right corner. The stars in this picture are to help illustrate the next step. |
 |
| From the last picture, lift only the top layer of paper and move it to the right. The 2 stars should touch; using the fold lines that were just created take the bottom star and lay it on top of the star to the right. This should be the result. Notice that there is now a small triangular flap created; my fingers are touching it. |
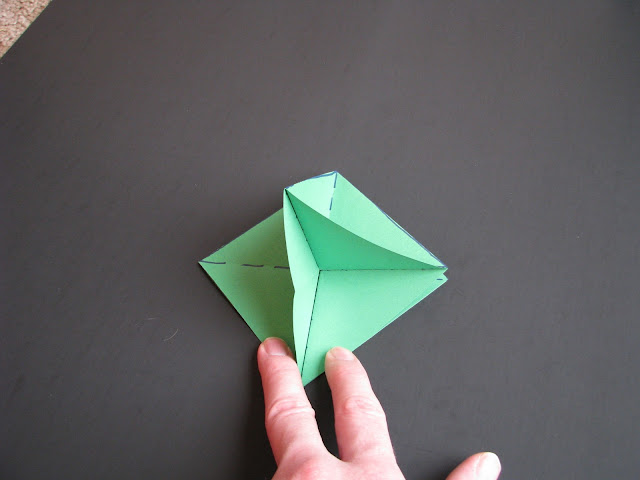 |
| In this step the small triangle flap is then tucked down and away into a pocket. Notice the stars are no longer visible. This step is a little difficult to show in a picture. In the picture 2 steps up there was a valley fold that was changed into a mountain fold. The triangle flap will slide into a pocket by means of those folds. After completing this step, perform the same steps on the remaining 3 flaps to create and tuck away the small triangle flap (or in other words, repeat the last 2 steps again on each flap). |
 |
| This is what the model looks like with 2 flaps tucked away. |
 |
| This is what the model looks like with 3 flaps tucked away. |
 |
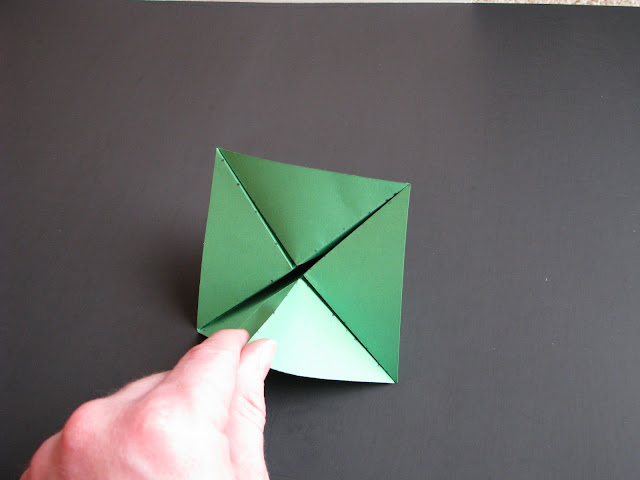
| This should be the result once all 4 flaps are tucked away. This is the bottom of the model. Notice that there are now 2 pockets that are intersecting to form a cross. |
 |
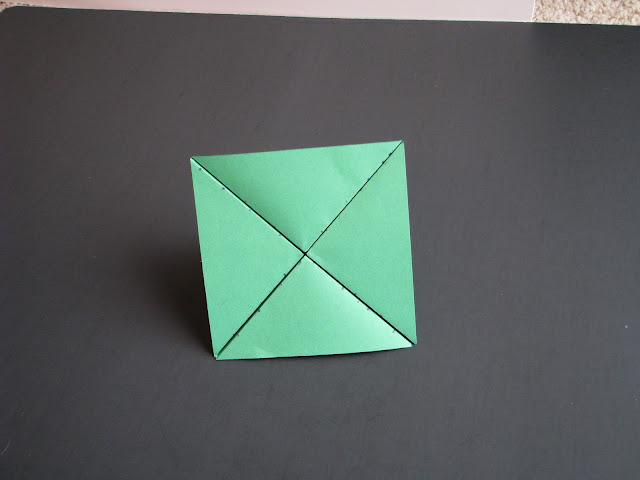
| This is model as shown from the top. |
 |
| Now move on to the piece of paper for the trunk. The pre-crease folds are similar to the first piece, with fewer folds. Again the dotted lines are valley folds while the solid lines are mountain folds. |
 |
| Once again bring the 4 corners to the same point to form the preliminary or bird base. |
 |
| At this point, take the right flap and create a valley fold. This is done by taking the top edge of the flap and laying it along the center line. Repeat on the remaining 3 flaps. Notice that flap on the left has a mountain fold when looking at the model from this angle. |
 |
| This should be the result after the valley fold on the right flap. |
 |
| This is the result with all of the flaps folded into the center. |
 |
| The next step adds a valley fold by taking only the bottom flap and folding it up along the edge of the previous step. Also, add a mountain fold that extends from the center vertical line to the lower right edge. |
 |
| This picture shows the pocket that will be used in the next step. The mountain fold in the previous step will be used to create a flap that is tucked into this pocket. |
 |
| Here is an intermediate picture of tucking the triangle flap into the pocket. |
 |
| This is the end result with the flap tucked in. Repeat on the remaining 3 layers. |
 |
| This is a picture of all 4 layers tucked in, looking at the bottom. |
 |
| A picture of the top of the trunk piece. |
 |
| Here is the bottom of the largest green piece and the top of the trunk piece. Notice that looking down on the top of the trunk piece it forms a cross or a plus symbol ("+"), and that looking at the bottom of the green piece it has a corresponding shaped pocket. |
 |
| Here is a picture of how the trunk inserts into the bottom of the largest green piece. Insert is as far as needed for the desired look. |
 |
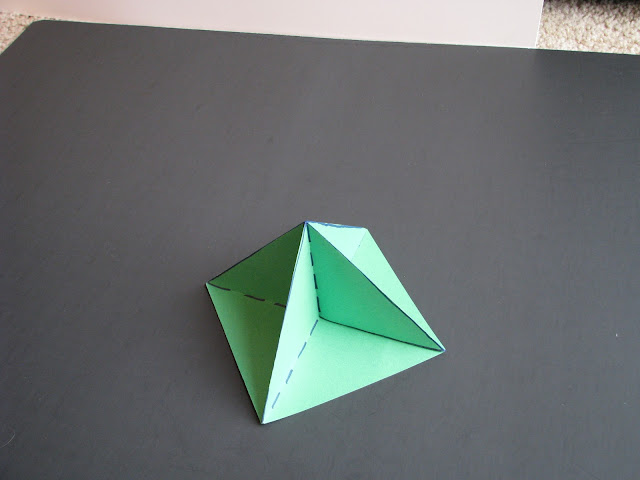
| Here is what the trunk and first piece look like standing up. |
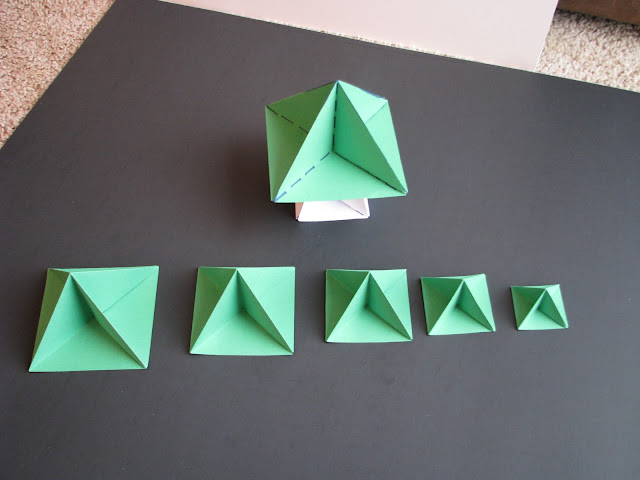 |
| After folding the remaining green pieces it is ready for final assembly. |
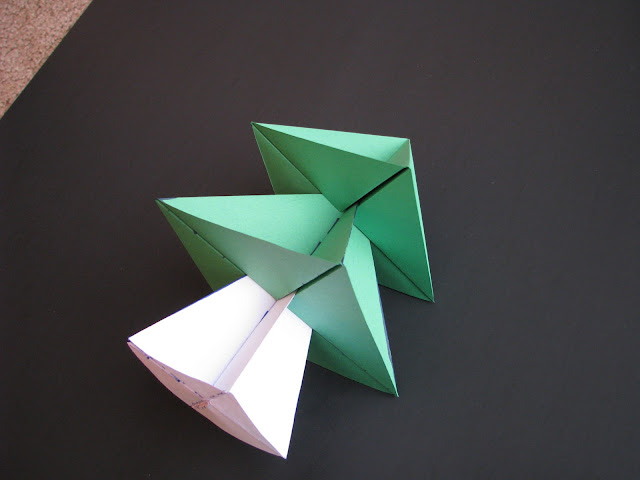 |
| Start with the next largest green piece and insert it on top of the tree that has already been put together. |
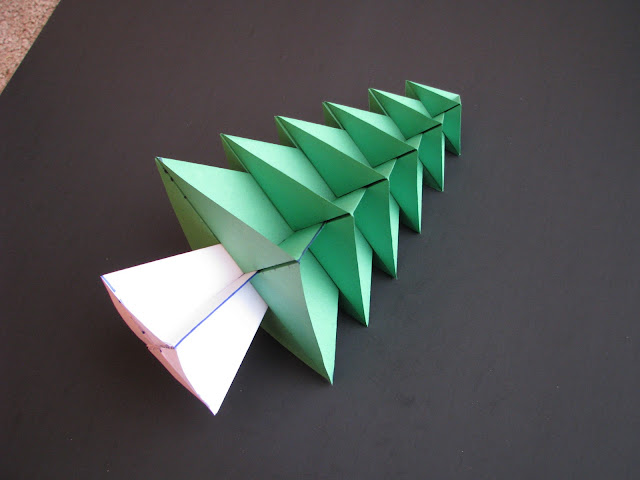 |
| This should be the result with all the pieces assembled. |
 |
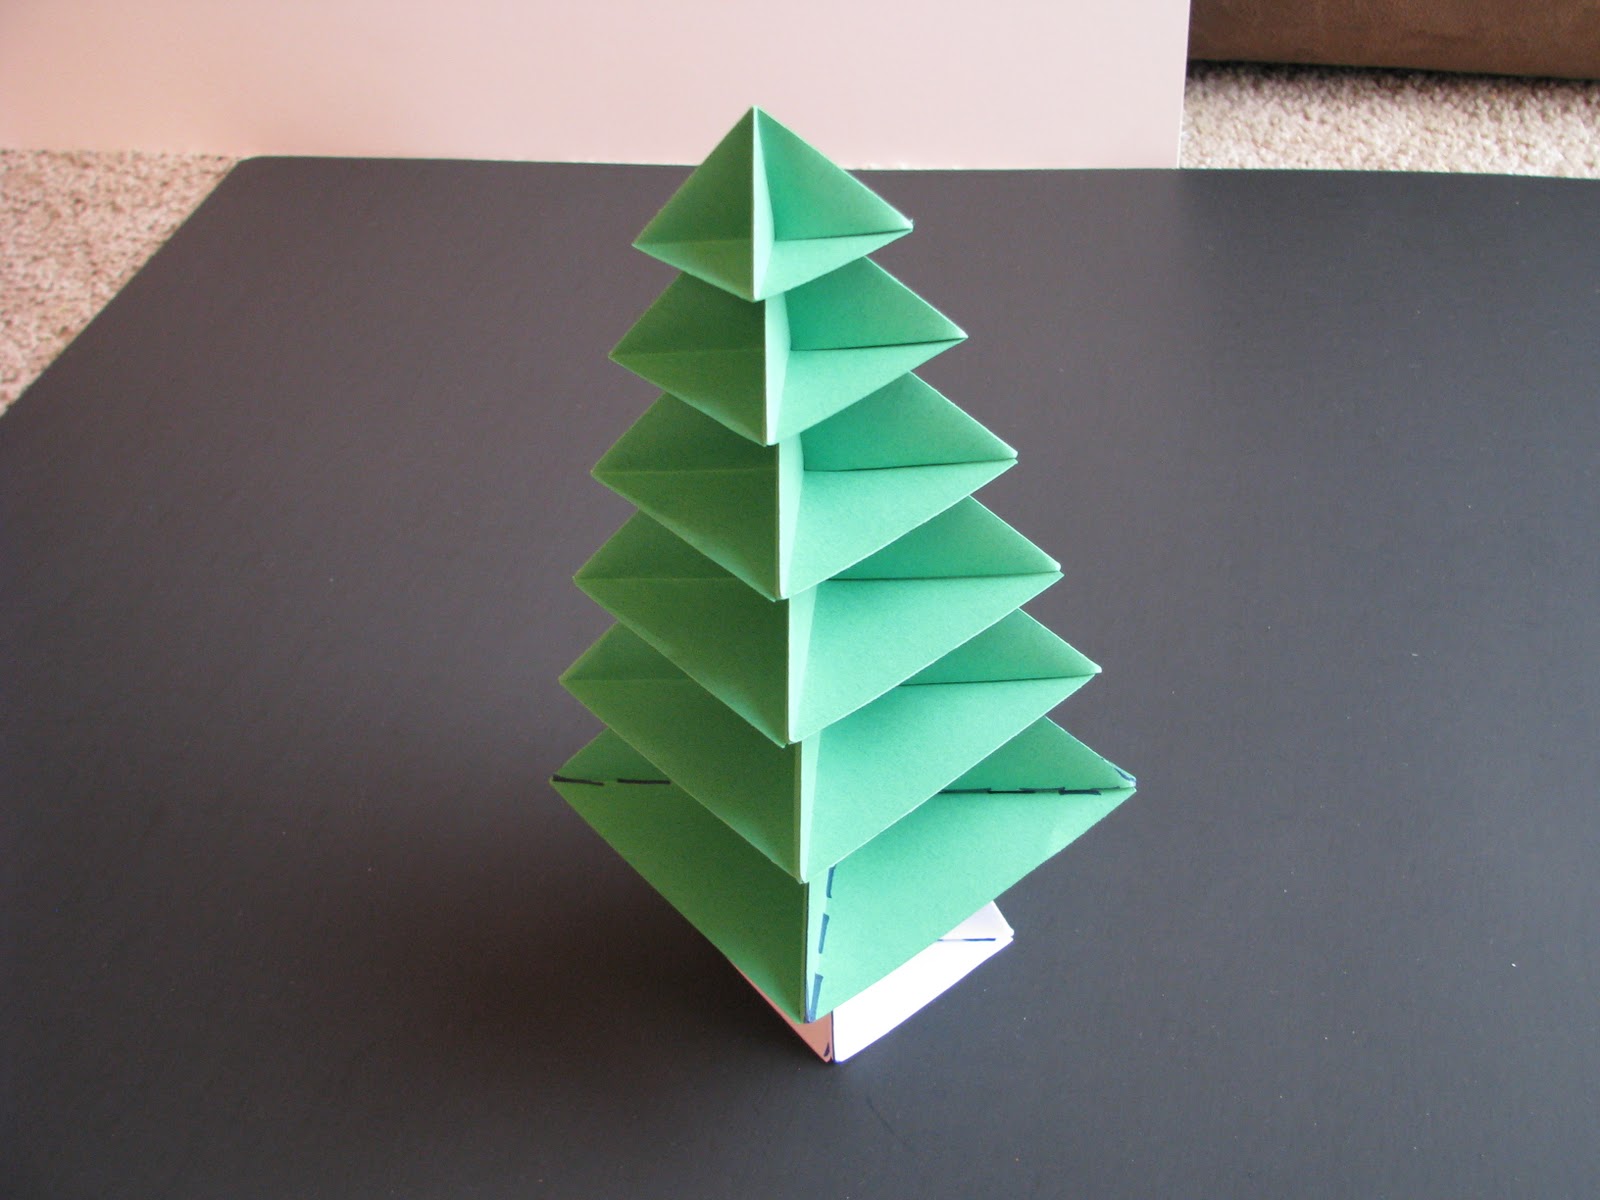
| This is the result of the tree standing. The height can be varied a great deal simply by pushing the pieces together or pulling them apart. |
 |
| Here is another picture with a black trunk and a star on top. Note: The star pictured here is also found in the same book, The Magic of Origami it is folded from a pentagon of paper, not a square. |
A few years ago I was asked to make center pieces for a church Christmas party and was glad to oblige. Here a couple of pictures from that. Several of the people asked if they could take them home and so I didn't come home with any of them. That was fine by me because I love sharing what I make.
 |
| Here are all of the individual pieces folded and arranged before assembly. |
 |
| Here is a picture of the completed trees arranged to look like a little forest. |
Well, I wish you luck with attempting this model, its a really fun one to fold. As this was my first attempt at a tutorial, I hope it was sufficiently clear and helpful. Please let me know if it is confusing or unclear at any point. If you have any questions or run into problems, feel free to leave a comment and I will help in any way that I can. If it turns out that this was a poor tutorial, maybe I will have to do a video showing how to do this; just let me know.
Once again, the book that I got this from is a great book to start learning. Even if you're fairly experienced, its still has some really fun models in it to try. Enjoy :)


0 komentar:
Posting Komentar