

Din pacate nu acest atelier nu a avut prea multi participanti, deoarece cu jumatate de ora inainte s-a pornit o ploaie torentiala cu grindina care a speriat mare parte din cei doritori sa invete un model de origami modular :D


One of the things that I absolutely love about the Internet is the vast array of free origami diagrams. I am always willing and desirous to purchase good origami books; not only to have a wonderful library available, but also to support the incredible work of the great origami masters. However, some of my favorite models have come from free diagrams found online. Probably the best resource that I've used is Flickr; it allows for posting fantastic pictures of the models along with a place to share the instructions on how to fold them. One of the newest contacts that I've found goes by the name credo_vsegda, whose name is Maria Sinayskaya. She's designed a great variety of origami kusudama models and has diagrammed and shared several of them. The one that caught my eye to try the first is titled Lotus Crown. Here was my first attempt:
 |
| My first attempt at the Lotus Crown (24-unit assembly) designed my Maria Sinayskaya. I love the color combination here, but sadly since it was my first try it doesn't look quite as nice as it could. Some of the individual units are fairly loose and sloppy. Also, after several attempts of trying to get the color pattern correct (where no 2 units of the same color connect directly to one another), I finally gave in to "good enough" and decided I'd try again at a later date. |
 |
| Another view of my first attempt at the Lotus Crown (24-unit assembly). From this angle it is a little easier to see how the the units aren't as crisp, clean, and neat as they could be (definitely not as good as the one folded by the designer). In particular the little flaps inside the center square wouldn't tuck back nicely like they're supposed to (due to my own additions in the folding process). |
 |
| Here is my second attempt at the 24-unit assembly of the Lotus Crown designed by Maria Sinayskaya. I like the color combination of this one less than the first, but the final model is much tighter and looks much crisper and clean. |
 |
| Another angle of the second attempt at the Lotus Crown (24-unit assembly). With this model, I not only held to the author's directions when it came to folding the individual units, but I was also able to assemble the model with the proper color pattern (none of the units of the same color connect to another unit of the same color). The assembly of this model was infinitely easier by using office binder clips to hold the units together until I was done. This was one of the main reasons the final model was so tight when done. |
 |
| Here is the model that I folded for one of the students in the Sunday School class I teach at the church I attend. In the book it is titled 'Dual Triangles' and can be folded into 3-unit or 4-unit assemblies. Here is the 4-unit assembly, which creates an octahedron (8-sided). In this model there are 8 octahedrons connected together in a type of cube fashion. |
 |
| Another angle of the 'Dual Triangle' model given as a birthday present. This particular assembled pattern is very sturdy and can be stood at several different points for display. There are a total of 64 individual pieces of paper folded and assembled here. |
 |
| Here is a display of some of my favorite origami tessellations that I've folded (all from the book by Eric Gjerde Origami Tessellations: Awe-Inspiring Geometric Designs |
 |
| There are several sizes that the acrylic panels can be purchased in. Here is a smaller size that can be used to display a single tessellation. This picture is a little better at showing the actual tessellation; a little difficult to fold, but looks fantastic when done. The tessellation is titled Chateau-Chinon. |
 |
| Another view of the smaller panels to give a better show of the size. This is the front of the tessellation. |
 |
| A final view of the smaller panels with a show of the back of the tessellation. |
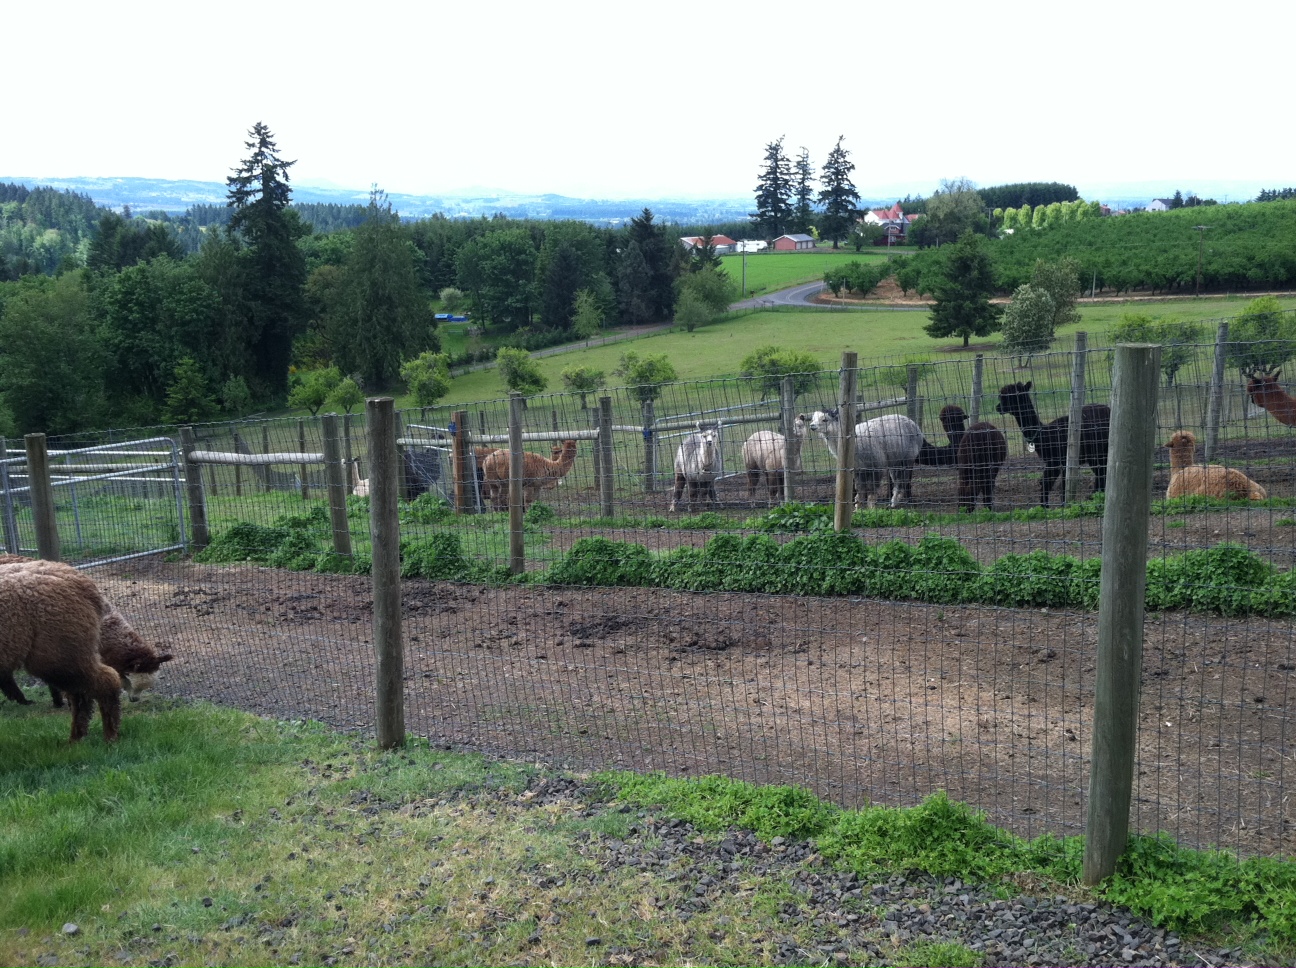
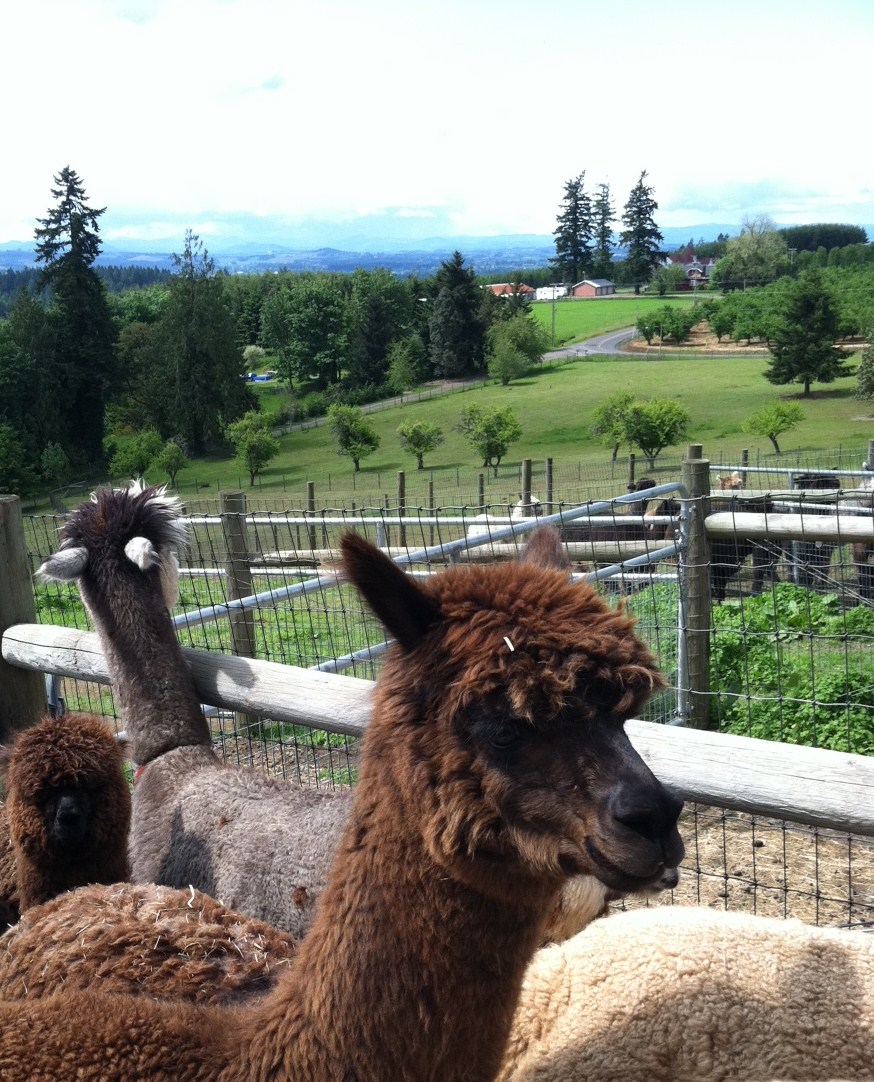
Itching to have a getaway day trip from Portland, my partner and I just drove to Sherwood area. While looking for a place to visit, we found out that this weekend, an alpaca farm in Sherwood is open to public, while many wineries in the same area are open for wine tasting. Ever since I heard about alpaca wool being much warmer than sheep wool and hypoallergenic, I've been curious about alpacas. I wanted to see what they are like.
The alpaca farm is just 30 minutes drive from southwest of Portland in Sherwood, Oregon. We enjoyed the drive through the rolling hills. As we arrive the farm and come close to these animals, I keep hearing funny noises that they make, different from any other animals I've heard. It's hard to describe or try to imitate the noise. They are just as funny looking as they are funny sound, but soooo cute!


Cateva poze de la atelierul organizat in cadrul Lunii Studentului Clujean 2011 la Diverta (Iulius si Polus).


